

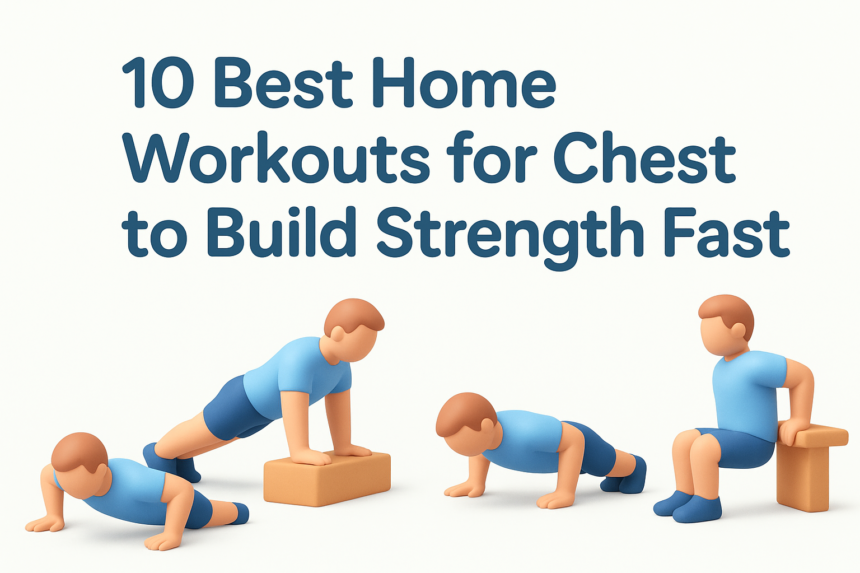
You skipped the gym membership, but you still want a chest that shows up in the mirror. No bench, no barbell, no problem. Good home workouts chest routines rely on your bodyweight and a little creativity, much like a 30 day beginner calisthenics workout, and they build real strength without a single trip to a crowded gym.
Here’s the direct answer: pushups, dips, and a handful of angle variations can hit your upper, middle, and lower pecs just as hard as machines do, as long as you control tempo and track progress. The trick with chest workouts at home isn’t fancy equipment, it’s picking moves that challenge your muscles from different angles and pushing yourself closer to failure each week.
This list breaks down 10 of the best chest workouts for home training, ranging from beginner-friendly pushup variations to advanced moves that torch your pecs using nothing but a chair, a wall, or the floor. You’ll get practical form tips and progression ideas for each exercise, so whether you’re just starting out or you’ve hit a plateau, you’ll walk away with a plan you can start using today.
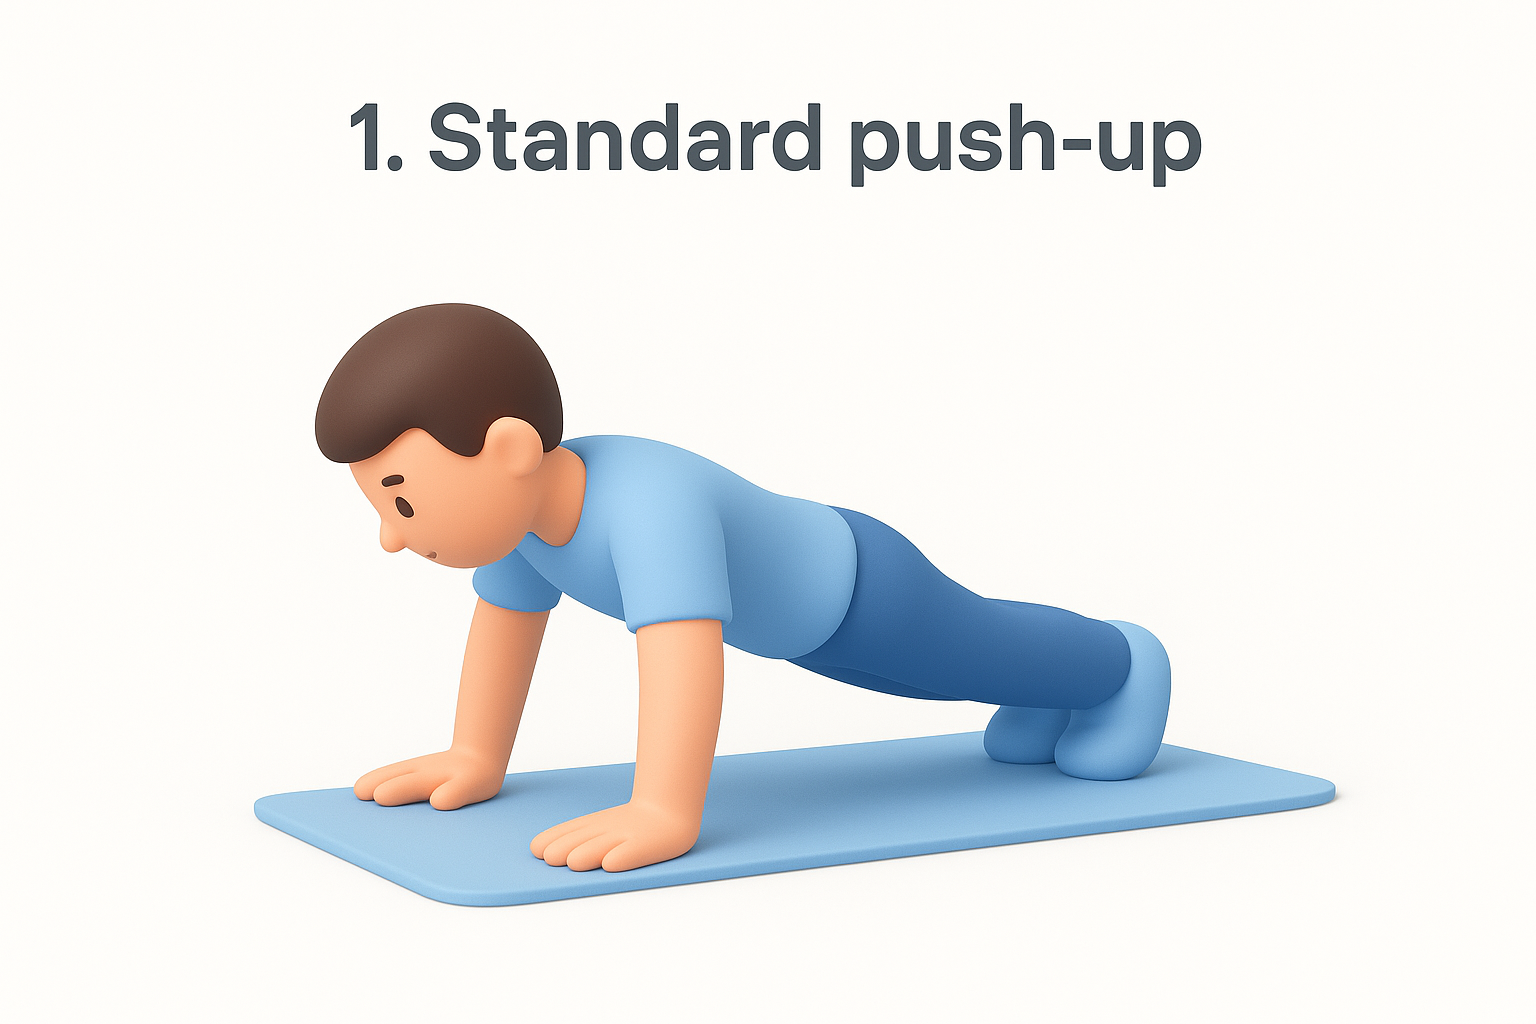
1. Standard push-up
The standard push-up is the foundation of every solid home pec workouts plan, and for good reason. It hits your chest, shoulders, and triceps in one movement, requires zero equipment, and scales from beginner to advanced just by adjusting your hand position or tempo. If you only had time for one move on this list, this would be it.
How to do it
Getting your form right here matters more than speed or rep count. Follow these steps:
- Start in a plank position with hands slightly wider than shoulder-width, fingers spread, and your body in a straight line from head to heels.
- Brace your core and squeeze your glutes so your hips don’t sag or pike up.
- Lower your chest toward the floor by bending your elbows at roughly a 45-degree angle to your torso, not flared out to the sides.
- Stop when your chest is an inch or two off the ground, then press through your palms to return to the start.
- Keep your neck neutral by looking slightly ahead of your hands, not straight down.
Many people rush this exercise and only travel halfway down, which shortchanges the stretch your pecs need to grow. Slow the descent to two full seconds and you’ll feel the difference immediately.
A push-up only builds chest strength if your chest actually touches down near the floor, not if you stop halfway.
Muscles worked
This single movement recruits your pectoralis major as the primary mover, with your anterior deltoids and triceps brachii kicking in as synergists. Your core and lower back also engage isometrically to keep your body rigid, which is part of why push-ups double as a mild ab move you can slot beside effective ab workouts at home. Because the movement mimics a horizontal press, it’s one of the closest bodyweight equivalents to a barbell bench press, making it a smart entry point if you eventually want to add weighted workouts for chest at home down the line.
Sets and reps to try
Your rep scheme should match your current strength level rather than some arbitrary number you saw online. Use this as a starting guide:
| Level | Sets | Reps | Rest |
|---|---|---|---|
| Beginner | 3 | 6-10 | 60-90 sec |
| Intermediate | 4 | 12-15 | 45-60 sec |
| Advanced | 4-5 | 15-25 | 30-45 sec |
Once you can comfortably knock out 20 clean reps in a set, standard push-ups stop being much of a challenge for building new strength. That’s your cue to slow the tempo down, add a pause at the bottom, or move on to a harder variation like the ones coming up next. Progression is what separates a workout that maintains your chest from one that actually builds it.
2. Incline push-up for upper chest
The incline push-up shifts your hands onto something elevated, a bench, sturdy chair, or even a coffee table, which changes the angle of the press and puts more demand on your upper pecs. This is one of the more underrated at home chest workouts because it’s easier on the shoulders than a standard push-up while still building real pressing strength. If your upper chest looks flat compared to the rest of your pecs, this move deserves a regular spot in your routine.
How to do it
Setup is quick and the movement pattern stays close to a standard push-up, just tilted.
- Place your hands on a stable elevated surface, shoulder-width apart, and walk your feet back until your body forms a straight line.
- Keep your core tight and hips level, resisting the urge to let them sag toward the floor.
- Lower your chest toward the edge of the surface, elbows at a 45-degree angle, until your upper arms are roughly parallel to the ground.
- Press back up firmly through your palms without locking your elbows out hard at the top.
- The higher the surface, the easier the exercise, so pick a height that challenges you by rep 8 or 9.
Raising your hands even a few inches shifts the workload toward your upper chest, the area most bodyweight moves tend to neglect.
Muscles worked
Incline push-ups emphasize the clavicular head of your pectoralis major, commonly called the upper chest, along with your front deltoids and triceps. Because the angle reduces the load compared to a flat push-up, it’s also a smart option if you’re rebuilding strength after a shoulder issue.
Sets and reps to try
Aim for 3 to 4 sets of 10 to 15 reps, resting 45 to 60 seconds between sets. Once 15 clean reps feels easy, lower the surface height or slow your tempo down to keep the challenge honest.
3. Decline push-up for lower chest
Flip the incline setup around and you get the decline push-up, where your feet rest on something elevated instead of your hands. This shift changes the pressing angle so more of the work lands on your lower pecs, the part of the chest that gives that shelf-like line just above your ribs. Among chest workouts for at home training, this one is often skipped because it’s tougher on the shoulders and core, but it rounds out a routine that would otherwise ignore the lower chest entirely.
How to do it
Setup takes a little more balance than a standard push-up, so start with a lower elevation until you trust your form.
- Rest the tops of your feet on a sturdy chair, bench, or step, with your hands on the floor slightly wider than shoulder-width.
- Walk your hands out until your body forms a straight line from shoulders to ankles.
- Brace your core hard, since the elevated feet put extra strain on your lower back if you let your hips sag.
- Lower your chest toward the floor with elbows at roughly 45 degrees, aiming your chest slightly past your hands.
- Press back up through your palms, keeping your body rigid the entire way.
The higher you elevate your feet, the more your shoulders take over from your chest, so keep the incline modest until your strength catches up.
Muscles worked
This variation shifts emphasis toward the sternal, or lower, portion of your pectoralis major, while your anterior deltoids pick up more load than they do in a flat push-up. Your triceps and core stay heavily involved too, since stabilizing that elevated position demands more total-body tension than most people expect.
Sets and reps to try
Stick with 3 sets of 8 to 12 reps to start, resting 60 seconds between sets, since the added shoulder demand fatigues you faster than a standard push-up. Once you can hit 12 reps with clean form, raise the elevation slightly or add a two-second pause at the bottom instead of chasing higher rep counts.
4. Diamond push-up for inner chest and triceps
Bring your hands together under your chest so your thumbs and index fingers form a diamond shape, and you’ve got one of the most effective home workouts for pecs that targets the inner chest and triceps at the same time. This variation is harder than a standard push-up because your base of support shrinks and your triceps have to work overtime to lock out the movement. If you’ve noticed a gap down the center of your chest when you flex, diamond push-ups are the fix most people overlook.
How to do it
The narrow hand position changes your leverage, so expect this one to feel tougher right away.
- Get into a plank position and bring your hands together under your chest, forming a diamond or triangle with your thumbs and index fingers touching.
- Keep your elbows tucked close to your ribs instead of flaring out.
- Lower your chest toward your hands with control, stopping just above the diamond shape.
- Press back up firmly, focusing on driving through your palms rather than your fingers.
- Keep your hips level throughout, since the narrower base makes it easier to let your lower back sag.
Tucking your elbows close, not the hand position alone, is what shifts the load onto your triceps and inner chest.
Muscles worked
Diamond push-ups place extra demand on the triceps brachii, a favourite target of targeted arm workouts for mass, and the sternal fibers of your pectoralis major closest to the center of your chest. Your front deltoids and core stay active as stabilizers, and because the movement is inherently less stable, your wrists and forearms get a solid isometric workout too.
Sets and reps to try
Start with 3 sets of 6 to 10 reps, resting 60 seconds between sets, since this variation fatigues your triceps faster than a wider hand position would. Beginners often need to drop to their knees for the first few weeks, which is fine, as long as you keep the elbow tuck and full range of motion intact while you build up to the full version.
5. Wide push-up for outer chest width
Place your hands well outside shoulder-width and you shift the emphasis toward the outer edges of your pecs, the part that gives your chest a broader look from the front. Wide push-ups are one of the simplest chest workouts home routines can include, since they use the same starting position as a standard push-up with just one tweak. Trainers who want more chest width without adding equipment often lean on this variation because it stretches the pec fibers further at the bottom of each rep.
How to do it
Getting the hand placement right is the whole game here, so take your time setting up before your first rep.
- Get into a plank position with hands roughly 1.5 to 2 times shoulder-width apart, fingers pointing slightly outward.
- Keep your body in a straight line from head to heels, bracing your core the same way you would for a standard push-up.
- Lower your chest toward the floor, letting your elbows flare out more than usual, closer to 60 degrees from your torso.
- Pause briefly at the bottom to feel the stretch across your chest before pressing back up.
- Avoid going so wide that your shoulders feel pinched or unstable, since that shifts strain away from the muscle and onto the joint.
Going wider stretches your pecs harder, but only if your shoulders stay pain-free through the full range.
Muscles worked
This variation targets the outer fibers of your pectoralis major while reducing how much your triceps contribute compared to a standard or diamond push-up. Your rotator cuff muscles also work harder to stabilize the joint, which makes this a useful move for building shoulder resilience alongside chest size.
Sets and reps to try
Stick with 3 sets of 8 to 12 reps, resting 60 seconds between sets, since the wider angle limits how many clean reps most people can manage early on. If your shoulders feel any pinching, narrow your hand placement slightly rather than pushing through discomfort.
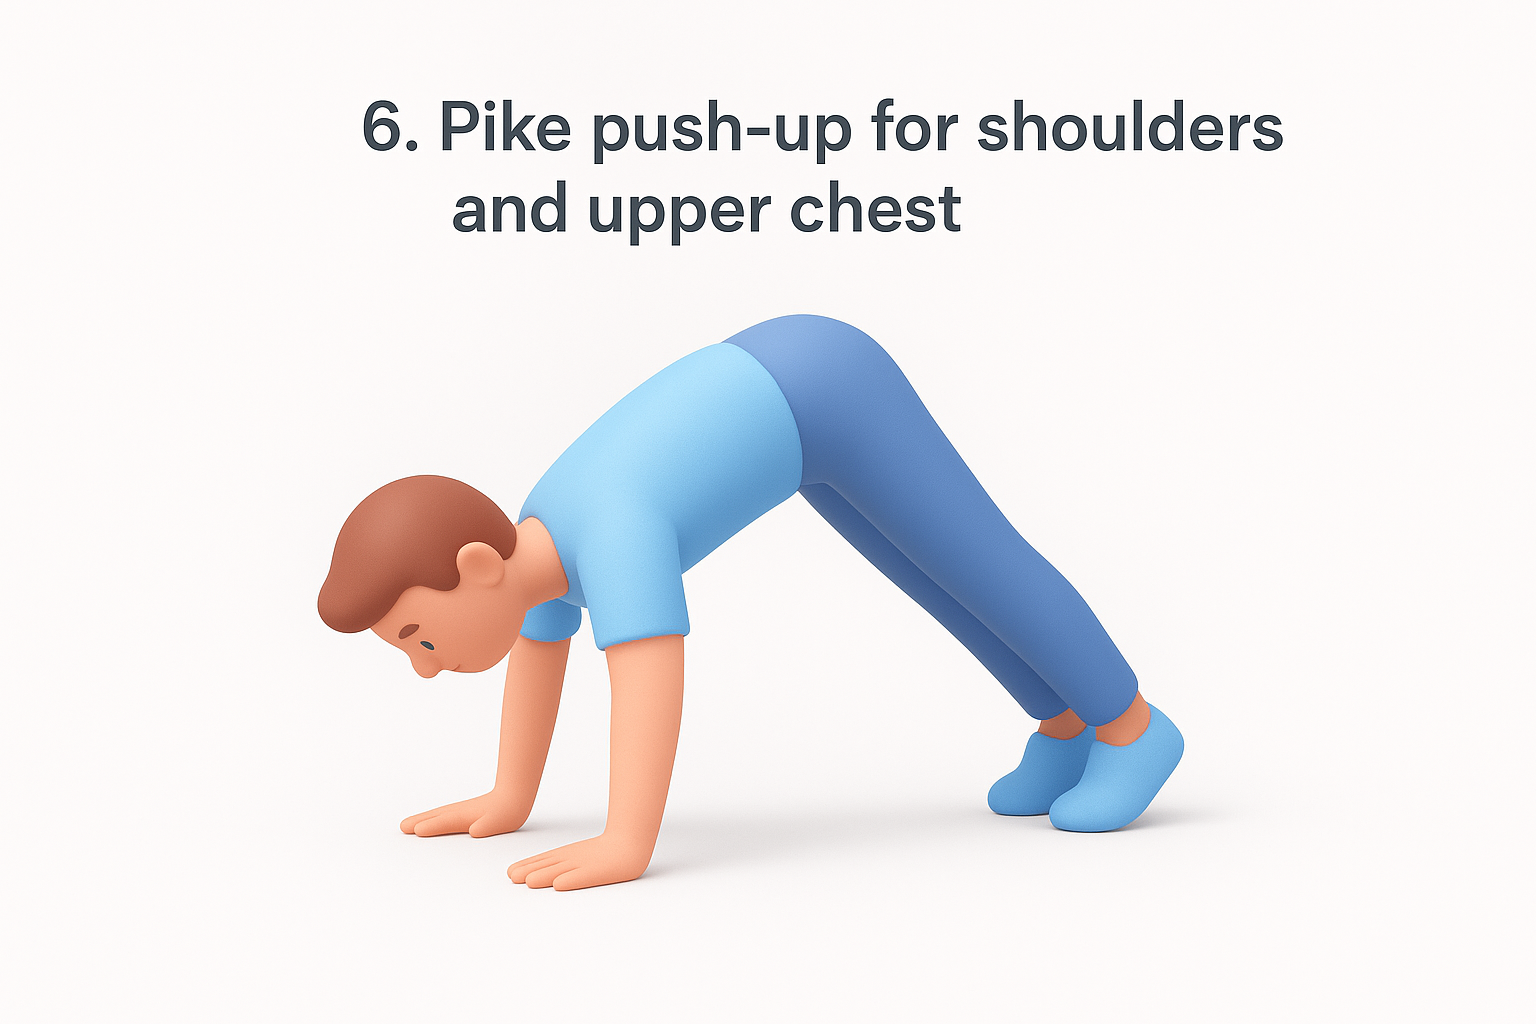
6. Pike push-up for shoulders and upper chest
The pike push-up bends you at the hips into an inverted V, which shifts the pressing angle closer to vertical and hammers your shoulders along with your upper chest. It’s one of the tougher workouts at home for chest because gravity works against you differently than in a flat push-up, forcing your shoulders and upper pecs to handle more of your bodyweight. If you’re chasing a fuller-looking upper chest and stronger shoulders without touching a dumbbell, this move belongs in your rotation.
How to do it
Setup takes a moment to get the hip angle right, so don’t rush into your first rep.
- Start in a plank position, then walk your feet toward your hands until your hips lift into an inverted V shape.
- Keep your hands roughly shoulder-width apart and your legs as straight as your hamstrings allow.
- Bend your elbows and lower the top of your head toward the floor between your hands, keeping your hips high.
- Press back up through your palms until your arms straighten, without letting your hips drop.
- Keep your neck relaxed and your gaze toward your feet, not straight ahead.
The higher your hips, the more vertical the press becomes, and the more your shoulders take over from your chest.
Muscles worked
Pike push-ups load the anterior deltoids heavily, with the clavicular head of your pectoralis major and triceps pitching in as strong secondary movers. Your core and upper back also stay tight throughout to keep the inverted position stable, which builds a kind of full-body control that flat push-ups don’t demand nearly as much.
Sets and reps to try
Aim for 3 sets of 6 to 10 reps, resting 60 seconds between sets, since the vertical pressing angle fatigues your shoulders faster than a standard push-up. Elevate your feet on a step once the basic version feels manageable, which turns it into a near-handstand push-up progression.
7. Chair dips for chest without push-ups
Sometimes your arms need a break from pressing straight ahead, and chair dips fill that gap perfectly. This move pulls your chest into the equation through a pulling-into-extension pattern instead of a push, which makes it a nice change of pace if you’ve been grinding through chest workouts in home routines built entirely around push-up variations. All you need is a sturdy chair, bench, or even a low step that won’t slide out from under you.
How to do it
Getting your hand and hip position right matters more here than in most push-up variations, since a wobbly chair turns this into a shoulder exercise fast.
- Sit on the edge of a sturdy chair and place your hands next to your hips, fingers pointing forward.
- Slide your hips off the front edge, keeping your knees bent and feet flat on the floor.
- Lower your body by bending your elbows to roughly 90 degrees, keeping your torso slightly leaned forward to shift load onto your chest.
- Press back up through your palms until your arms straighten, without locking your elbows out hard.
- Keep your shoulders down and away from your ears throughout the movement.
Leaning your torso forward during dips is what pulls the work into your chest instead of leaving it all on your triceps.
Muscles worked
Chair dips recruit the lower pectoralis major fibers along with your triceps brachii and anterior deltoids, similar to a decline press pattern. Straightening your torso upright shifts almost all the tension to your triceps, so the forward lean is the detail that actually makes this a home pec workouts move rather than a pure arm exercise.
Sets and reps to try
Start with 3 sets of 8 to 12 reps, resting 60 seconds between sets, and stop a rep or two before your shoulders start to ache. Once bodyweight dips feel easy, add resistance by placing a weighted backpack across your lap or elevating your feet on a second chair.
8. Dumbbell floor press for added resistance
If you own even a light pair of dumbbells, the floor press adds a resistance option that bodyweight moves can’t match. This exercise mimics a bench press, one of the best compound workouts for maximum efficiency, but with your back flat on the floor, which shortens your range of motion and takes your shoulders out of the deepest, riskiest part of the lift. It’s a strong pick among home workouts for the chest once you’ve maxed out what push-ups alone can offer, since you can keep adding weight indefinitely instead of hunting for harder bodyweight variations.
How to do it
Setting up on the floor instead of a bench changes a few details, so run through this checklist before your first rep.
- Lie on your back with your knees bent and feet flat, holding a dumbbell in each hand at chest level.
- Press the dumbbells straight up until your arms are extended but not locked out hard.
- Lower the weights slowly until your upper arms touch the floor, then pause briefly.
- Press back up through your palms, keeping your wrists stacked over your elbows the whole way.
- Avoid arching your lower back off the floor to gain extra range, since the floor is meant to limit that.
The floor stopping your elbows early isn’t a flaw, it protects your shoulders while you still load real weight onto your chest.
Muscles worked
The floor press targets your pectoralis major through most of its fibers, with heavy assistance from your triceps and front deltoids. Because the floor cuts the range short, your chest gets less stretch than a full bench press provides, but you trade that for a joint-friendly version of pressing that’s easier to load safely at home.
Sets and reps to try
Start with 3 sets of 8 to 12 reps, resting 60 to 90 seconds between sets, and pick a weight that makes the last two reps genuinely hard. Add weight in small increments once 12 reps feels manageable with strict form, rather than rushing to heavier dumbbells before your control catches up.
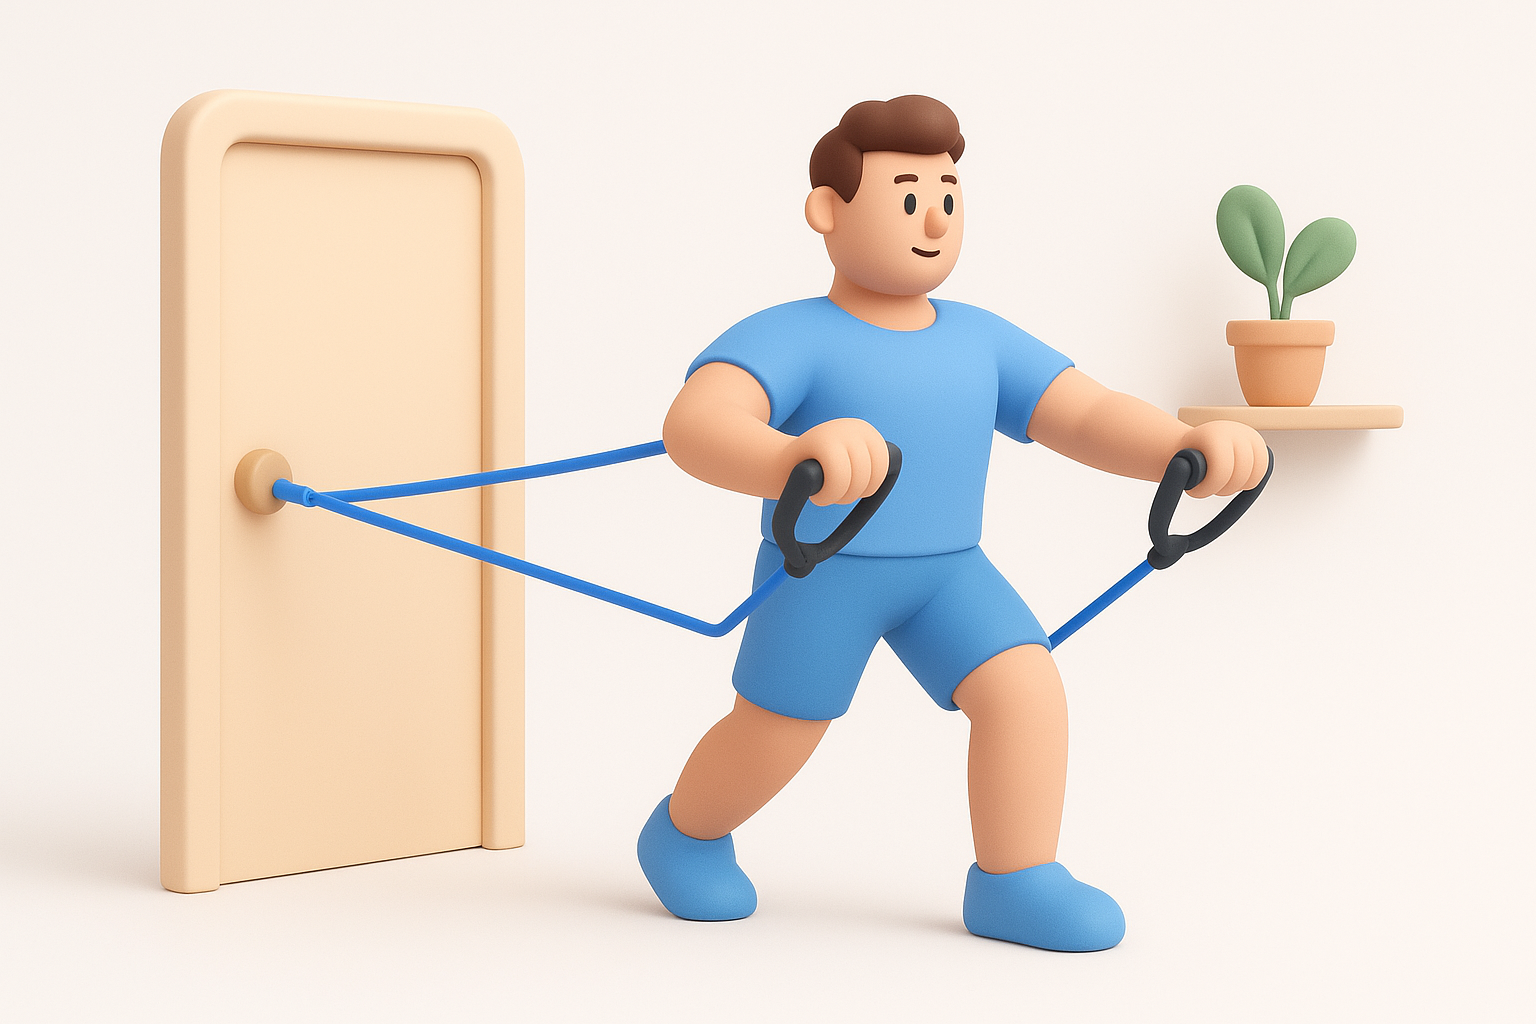
9. Resistance band chest press for constant tension
A resistance band costs less than a pizza and rolls up small enough to stash in a drawer, but it solves a real problem with bodyweight training: your pecs get more resistance at the bottom of a push-up and less at the top. Bands flip that script by keeping constant tension on your chest through the entire range, which makes this one of the more versatile chest workouts from home you can build a whole session around. Anchor one to a door, a sturdy railing, or even a heavy piece of furniture and you’ve got a home cable machine substitute for under twenty dollars, plus a whole library of resistance band workout routines to borrow from.
How to do it
Getting the anchor point right determines whether this feels like a real chest press or just an arm workout.
- Loop the band around a stable anchor point behind you at roughly chest height.
- Hold one handle in each hand, step forward until there’s tension, and stagger your feet for balance.
- Press both hands forward until your arms are extended, squeezing your chest at the peak.
- Return slowly, resisting the band’s pull rather than letting it snap your arms back.
- Keep your core braced and your torso still, since bands tempt you to lean into the movement instead of pressing through your chest.
A resistance band punishes sloppy form immediately, because there’s no momentum to hide behind.
Muscles worked
The band press targets your pectoralis major through a full range of motion, with your front deltoids and triceps assisting on the lockout. Because the resistance climbs as you extend your arms, your chest works hardest right where push-ups tend to go easy, which fills a real gap in most bodyweight-only routines.
Sets and reps to try
Aim for 3 sets of 12 to 15 reps, resting 45 to 60 seconds between sets, and choose a band thickness that makes the last three reps tough without wrecking your form. Doubling the band or standing farther from the anchor point are both easy ways to add resistance once the current setup stops challenging you.
10. Plyometric push-up for explosive power
When you’re ready to graduate from strength to raw power, the plyometric push-up delivers a jolt that no slow-tempo variation can match. You push explosively enough that your hands leave the floor, which trains your fast-twitch muscle fibers and builds the kind of pressing power that carries over to sports, throwing motions, and even everyday tasks like catching yourself from a fall. Among home workouts chest routines, this is the one that turns a strength session into something closer to athletic training, and it’s a fitting finisher for this list since it demands everything you’ve built with the previous nine moves.
How to do it
Explosive movement means your setup and landing mechanics matter even more than usual.
- Start in a standard push-up position with hands slightly wider than shoulder-width.
- Lower your chest toward the floor with control, just like a standard push-up.
- Drive up explosively, pushing hard enough that your hands lift off the ground briefly.
- Land softly with bent elbows to absorb the impact, then flow straight into the next rep.
- Keep your core tight throughout, since a loose midsection makes the landing far harder to control.
Landing soft, not jumping high, is what separates a safe plyometric push-up from a wrist injury waiting to happen.
Muscles worked
This move recruits the same pectoralis major, anterior deltoids, and triceps as a standard push-up, but the explosive demand adds heavy involvement from your core and wrists as stabilizers during landing. The rapid stretch-and-contract cycle also trains your nervous system to fire faster, which is a benefit slower strength work simply doesn’t provide.
Sets and reps to try
Keep sets short since power work fatigues fast: try 3 to 4 sets of 5 to 8 reps, resting a full 90 seconds between sets. Quality beats quantity here, so stop the set the moment your landings start getting sloppy rather than chasing one more rep.
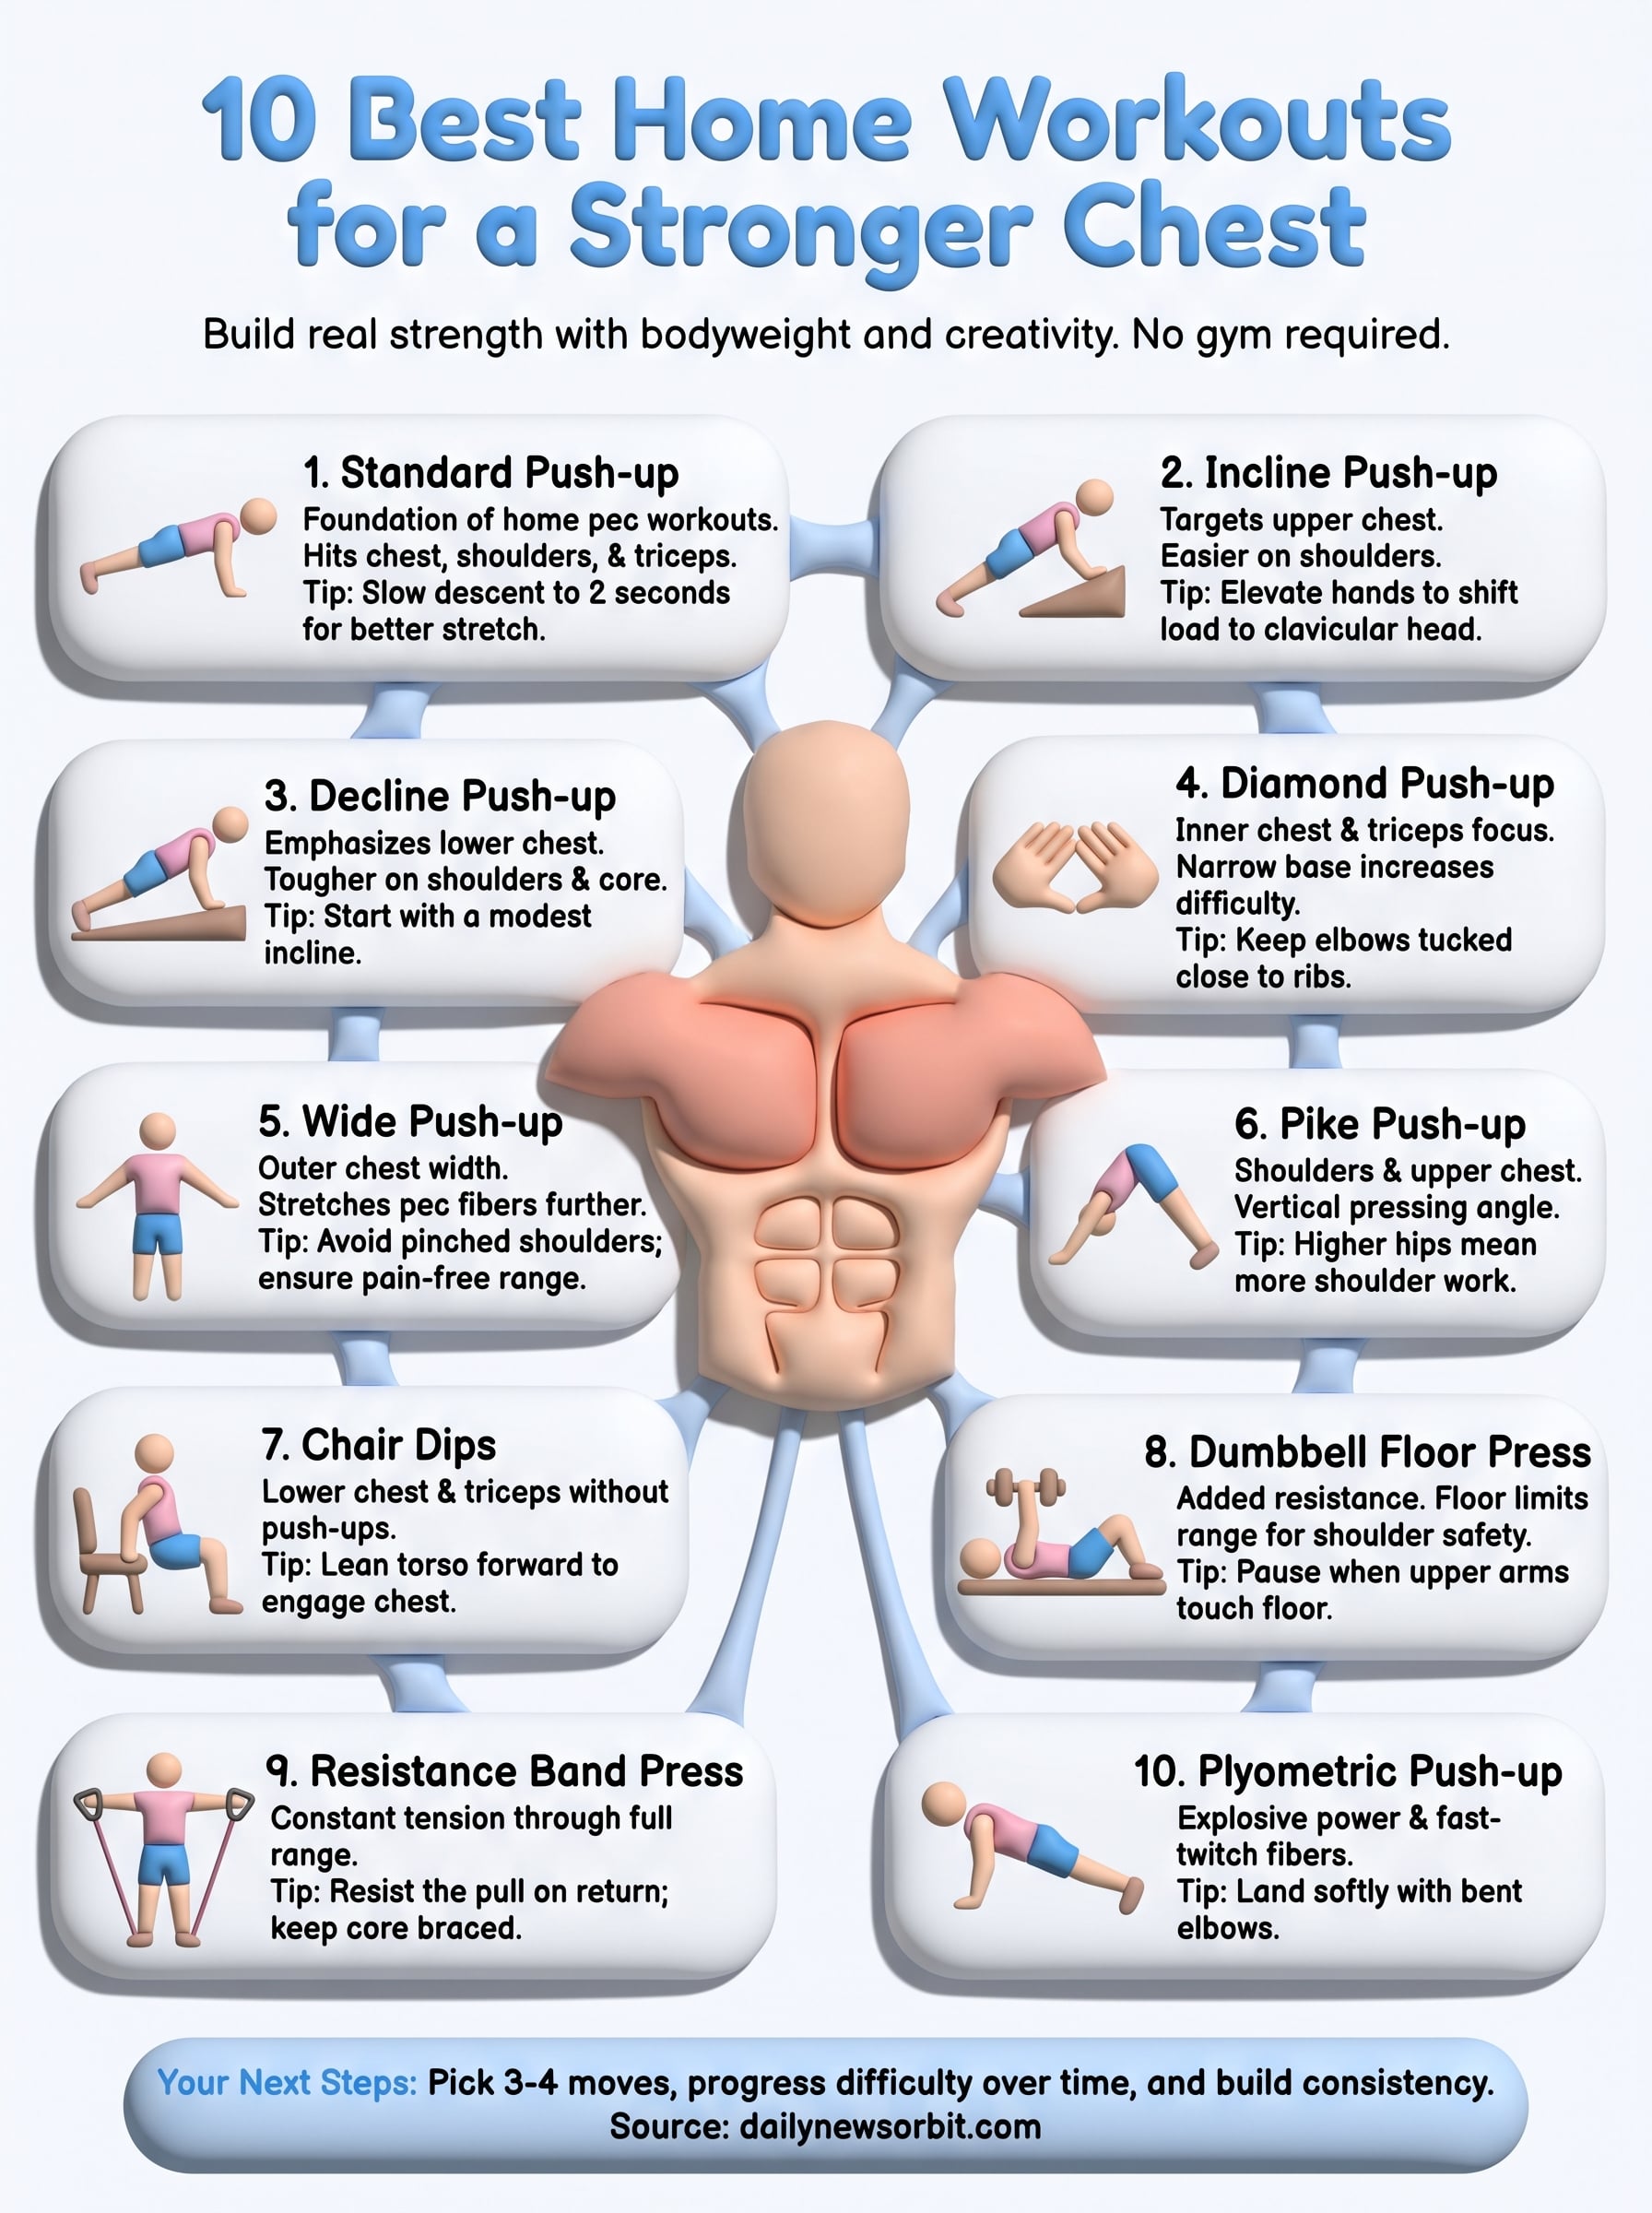
Your next steps for a stronger chest
Building a stronger chest doesn’t require a gym card, it requires consistency and a willingness to make each move harder over time. You now have ten home workouts chest routines that hit every angle of your pecs, from the upper fibers you target with incline push-ups to the explosive power you build with plyometrics. Pick three or four exercises that match your current level, string them together twice a week, and add reps or difficulty as soon as the current version feels easy.
Start small if you’re new to this. Two beginner moves and one intermediate variation is plenty for your first few weeks. Track your reps, note when a set stops feeling hard, and bump the challenge before you plateau. And if you want a structured way to turn these moves into a habit, follow a 30 day starter plan for new exercisers and keep building from here.